


Compass Zone Selection
1. Turn the ignition switch to ON
 .
.
2. Press and hold the MENU button until the
display shows the compass setting menu
list.
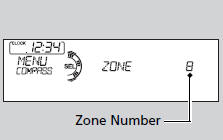
3. Rotate  to select ZONE,
then press
to select ZONE,
then press  .
.
The display shows the current zone
number.
4. Rotate to select the zone
number of
your area (See Zone Map), then press
.
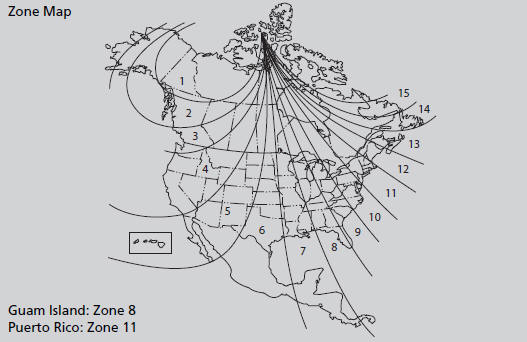
The zone selection is done to compensate the variation between magnetic north and true north.
If the calibration starts while the audio system is in use, the display returns to normal after the calibration is completed.
Models with audio touch screen
When you turn the ignition switch to ON
 , the compass self-calibrates, and
the
compass display appears.
, the compass self-calibrates, and
the
compass display appears.
Compass operation can be affected under the following conditions:
• Driving near power lines or stations
• Crossing a bridge
• Passing a large vehicle, or driving near a large
object that can cause a magnetic disturbance
• When accessories such as antennas and roof racks
are mounted by magnets
See also:
Jump Starting
Jump Starting Procedure
Turn off the power to electric devices, such as audio and lights. Turn off the
engine, then open the hood.
1. Connect the first jumper cable to your vehicle's
termin ...
If the Malfunction Indicator Lamp Comes On or Blinks
■ Reasons for the indicator lamp to come on or blink
• Comes on when there is a problem with the engine emissions control
system, or the fuel fill cap is missing, or loose.
• Blinks whe ...
Installing a Child Seat
After selecting a proper child seat and a good place to install the seat, there
are three main steps in installing the seat:
1. Properly secure the child seat to the vehicle. All child seats must
...