


Driving Position Memory System*
You can store two driver’s seat and door mirror positions with the driving position memory system.
When you unlock and open the driver’s door with a remote, the seat and door mirrors adjust automatically to one of the two preset positions.
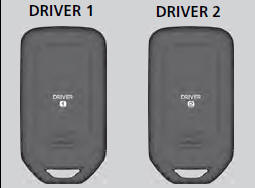
Select either remote you use to unlock the vehicle when you enter.
• DRIVER 1 transmitter is linked to memory button 1.
• DRIVER 2 transmitter is linked to memory button 2.
Models with smart entry system
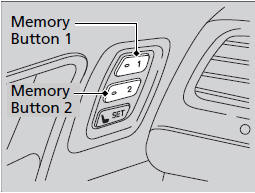
Models without smart entry system
Models with audio/information screen
Using the audio/information screen, you can disable the automatic seat adjustment function.
■Storing a Position in Memory
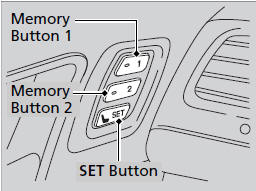
1. Turn the ignition switch to ON  .
Adjust
the driver’s seat and the door mirrors to the
desired position.
.
Adjust
the driver’s seat and the door mirrors to the
desired position.
2. Press the SET button.
-You will hear a beep, and the memory button indicator light will blink.
3. Press and hold memory button  or
or
 within five seconds of pressing the SET
button.
within five seconds of pressing the SET
button.
- Once the seat and the door mirrors position has been memorized, the indicator light on the button you pressed stays on.
After you press the SET button, the storing operation will be canceled when:
• You do not press the memory button within five
seconds.
• You readjust the seat position before the doublebeep.
• You readjust the door mirrors.
• You turn the ignition switch to any position except
ON .
■Recalling the Stored Position
1. Move the shift lever to  .
.
2. Apply the parking brake.
3. Press a memory button ( or
or
 ).
).
- You will hear a beep, and the indicator light will blink.
The seat and the door mirrors automatically move to the memorized position. When they finish moving, the beeper sounds, and the indicator light stays on.
The seat and the door mirrors stop moving if you:
• Press the SET button, or a memory button (
or
).
• Adjust the seat position.
• Adjust the door mirrors.
• Shift into any position except .
See also:
Remote Transmitter Care
Replacing the Button Battery
If the indicator does not come on when the button is pressed, replace the
battery.
NOTICE
An improperly disposed of battery can damage the
environment. Always confir ...
Maintenance Service Items
*1: If a message SERVICE does not appear more than 12 months after the
display is reset, change the engine oil every year.
*2: If you drive in dusty conditions, replace the air cleaner element
...
Fuel Economy
Actual Mileage and EPA Fuel Economy Estimates Comparison.
Fuel economy is not a fixed number.
It varies based on driving conditions, driving habits and vehicle condition.
Therefore, it is not possi ...